Easy Way to Dig Hole for Fence Post
By Mark Clement
The Hole truth: Tips for digging the perfect Post-Hole
A post-hole is more than just a hole in the earth. It is a shaft cut straight down into the ground to particular size in a particular place, despite all the root and rock obstacles between your shovel point and the bottom. It is also a heck of a lot of work, so I want to do it right the first time whenever possible.
"Right?" You might ask. "Dude, it's a hole. Taking yourself a little too seriously? Grab your post-hole digger and get to it."
This reply might fly, say for a mailbox post (but even those must comply with mailbox placement regulations—see Side Note 1).
However, for a deck, fence or pergola, post holes need to be right or something goes seriously wrong with carpentry layout, profitability and/or inspection. If they're not the right shape and correct depth, they won't fly.
I've dug (and re-dug) hundreds of post holes, both alone and with other people, who swear they know how to do it. The key to digging post holes correctly is to understand what you're digging and to throw away old assumptions about the tools everyone has in their shed or garage.

What it is
It's best to think about post holes as shafts. They descend straight (plumb) down from where you start digging them. The sides of the shaft are straight and the bottom of the hole is flat (or at least flat-ish). In other words, if your hole looks like a cup or a bowl, well, it's not a post-hole.
This concept is pretty easy to get your head around. In reality, however, it is more difficult to execute because it requires us to use the most basic tools we own (shovels, digging bars, etc.) that we've all used a zillion times for shoveling projects—mulch/snow, leveling the yard, turning over the garden—in a different way. Digging a proper posthole is all about getting started in the right place and going the right direction. And that is harder than it sounds.
Getting Started
Different people lay out post-hole locations differently, usually by running strings or pulling lay-out from an existing structure. However you get there, the first thing to do is mark the whole hole.
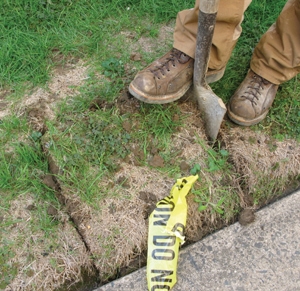
Center. The first thing I mark is the center of the hole. I then take a screw or nail, shove it through a hunk of caution tape or red duct tape, and plug it into the ground. Next, I grab a can of spray paint and paint a 24-in. "X" across the center of the hole. (I learned this trick in Joplin, Missouri, building the Boomtown playground with the crew of Extreme Makeover: Home Edition.) This cross mark helps keep me on target. The first step is to dig out the screw marking the hole's center.
Get the Shape, Cut the Sod
Like many projects, starting on the right foot is an indicator of things to come. For post holes, I like to slice the earth at the top of the hole in a square, and there's hardly a better tool for that than a garden spade. You can measure your hole width (decks with 6-by-6 posts or 12-in. builder's tube usually require a hole that is 16-by-16-in. square or diameter or larger).
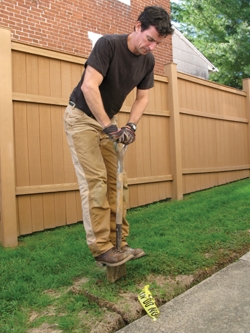
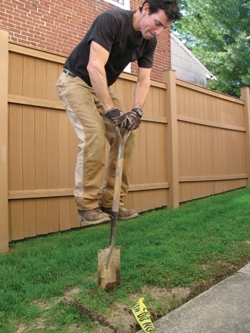
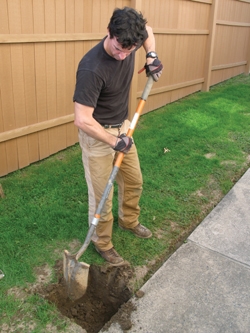
The other critical job the spade does is help get the sides of the hole going down straight from the get-go—which is the first hardest part of the job and the thing that'll chase you right down to the bottom of the hole. Lean the handle away from you to get the blade plumb, and then jump on the bad boy like you mean it to sink the blade below the sod.
Earthwork
I like the spade to get started, but after getting under the sod, I need to scoop out the loose dirt that's in the hole, and for that I switch to the long-handled shovel.
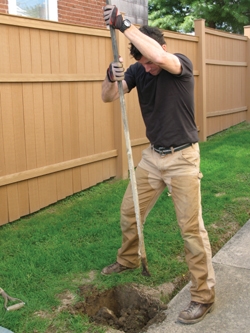

To cut the earth straight off the sides of the shaft, you have to lean the shovel handle outward in a way that might seem uncomfortably far away from your body. However, you know that when you're reaching for the handle, the blade of the shovel is cutting straight down. It is usually around this point in the hole where things go wrong with a rookie because they try to scoop instead of cut. Once you've sheared off the sides of the hole into the bottom, then you scoop out the loose fill.
That's pretty much the mojo, although root, rock, clay and other obstructions will conspire to nudge you off course. Nudge them back.
Obstacles
Digging a shaft is harder than most people think, and it takes almost nothing to get off track. It's kind of like swimming in a straight line under water—there's nothing to gauge your progress against. A root or rocks can knock even a skid-steer powered auger off line. To help keep the shaft plunging straight down, I employ a whole battery of tools.
Digging Bar. My primary go-to for layers of rock-hard clay, smallish rocks and roots is my digging bar. It can pierce and puncture clay layers. I slam it down the edges of the shaft, then I use it to chew up the center of the hole. I then return it to the edge of the hole and pry against the rim until I'm through the clay. Rinse and repeat. And, unless you've got calluses on your calluses, wear gloves; this steel likes skin.
There's also nothing more brutal on small roots than the digging bar blade. Kind of like a shear, I plunge the bar down into them. Sometimes I start at the edge of the root to get it cut, then take subsequent blows to get it out.
The bar can also pry rocks out from the edge of the shaft. And, if there is an old footing down there, such as the edge of a sidewalk or rock that'll fracture, you can use the digging bar to delete those obstacles with lead-pipe brutality.
However, when pounding down into the hole, make sure to try and keep the rim intact. No matter what happens inside the hole, this is the control point.
Recip Saw. Some roots are simply too big for a digging bar to cut through—and too deep for a mattock (awesome root cutter) or axe—to get at. For those, I clear as much dirt from around them as I can and cut them out using my recip saw. Expect dirt to blow up in your face from the saw's exhaust, and for typical demo blades to gum up because the wood is so green. Skil's Ugly blade, with its massive gullets and super sharp teeth, really evens the odds.
Jackhammer or Rotary Hammer. I've encountered dirt so hard that there is simply no other way through it than to go hardcore muscle. For those instances, an electric jackhammer can save the day. I've also found my way through uber soil using my rotary hammer and a "spade" type bit. It breaks the soil up just like a jackhammer will, but with less power and more maneuverability. You can rent either tool easily.
Depth
To meet structural requirements for inspections, whether you're building a deck or dropping piers for an addition, the inspector not only wants to see the bottom of the hole, but that the bottom is far enough away from the top. An easy way to get a measurement is to bridge the hole with something straight like your shovel or hunk of 2-by so you can sink your tape and get a decent reading.
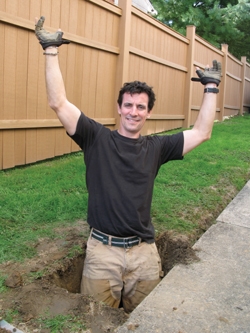
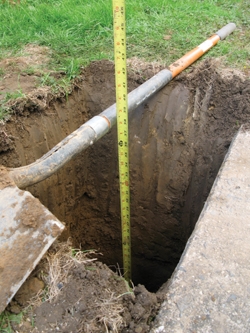
The Bottom. Getting every fleck of dirt out of the hole isn't really possible, so once I'm deep enough and have made the bottom relatively flat, I jump in and tamp it down with my feet. Trust me when I tell you that a hole bottom that is flat and free of debris makes positioning a post or tube significantly easier. And every inspector I've met likes to see nice, neat work. Once they start seeing sloppy stuff, they're extra vigilant. In other words, if you can't get the hole right, what else is a mess?
Extra Dirt and The Refill
In a landscaped yard dirt can co-mingle with the grass and be a mess to clean up, especially on extended projects and/or if it rains. A sheet of plywood is a great bond-break between grass and dirt congealing around it. Sheet plastic works too, as long as you're re-filling in 24 hours or so. And, on longer projects, it makes sense to cover the dirt pile with plastic to keep it dry so it is easier to work when refilling.
You will have more dirt left over after the fact. The post, tube, concrete etc., all take up space—plus the dirt is entrained with air. There are a number of techniques to refill the hole, all of which work with varying degrees of success.
You can tamp down the dirt as you refill it (with a tamper, the back of a digging bar or the head of a sledgehammer), but you have to be careful not to move the post as you pack dirt around it. You can also overfill the hole, which will then sink down as water and gravity take effect. The top of the hole may stay proud of the ground or sink below, so this one can be tricky.
The bottom line is that in order to build up, you have to dig in and dig down first.
SIDE NOTE 1
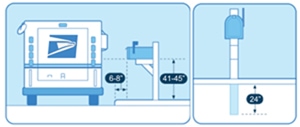 Mailbox Guidelines
According to the Us Postal service, your local postmaster must approve the location of your mailbox. This typically means that a roadside mailbox must be located where a carrier can reach inside without leaving the truck. That means positioning it about 41 to 45 in. off the ground and back about 6 to 8 in. from the curb.
SIDE NOTE 2
Post-Hole Tools
My main post-hole tools are a spade, long-handled shovel, a digging bar and a tape measure and/or level (for layout and depth measurement). You might notice there is no post-hole digger. Not only are they brutal to use (I have rarely been as sore after a day behind a post-hole digger), but they either don't cut a big enough hole, won't cut through tough soil, or they don't scoop out as much dirt as I can get with my shovel. I'm not saying they don't work, but when you're staring down a dozen 40-in. deep holes for a fence, any move you can save is a good move.

Source: https://extremehowto.com/digging-perfect-post-hole/
0 Response to "Easy Way to Dig Hole for Fence Post"
Post a Comment